Solana NFT Burner
Introduction
This tutorial teaches you how to create your very own NFT burner dapp in NextJS using Metaplex JS SDK, and the Moralis API.
Once complete, you can use this dapp to burn spam or unwanted NFTs from your wallet in just a few clicks, and burning Solana NFTs also returns back Solana to your wallet.
Why Does Burning Solana NFTs Give You Solana Tokens Back?
When we burn NFTs, the Solana program returns back the remaining rent in the NFT account to the current NFT owner. So, even by burning spam or unwanted NFTs, we can recover some Solana tokens from NFT accounts.
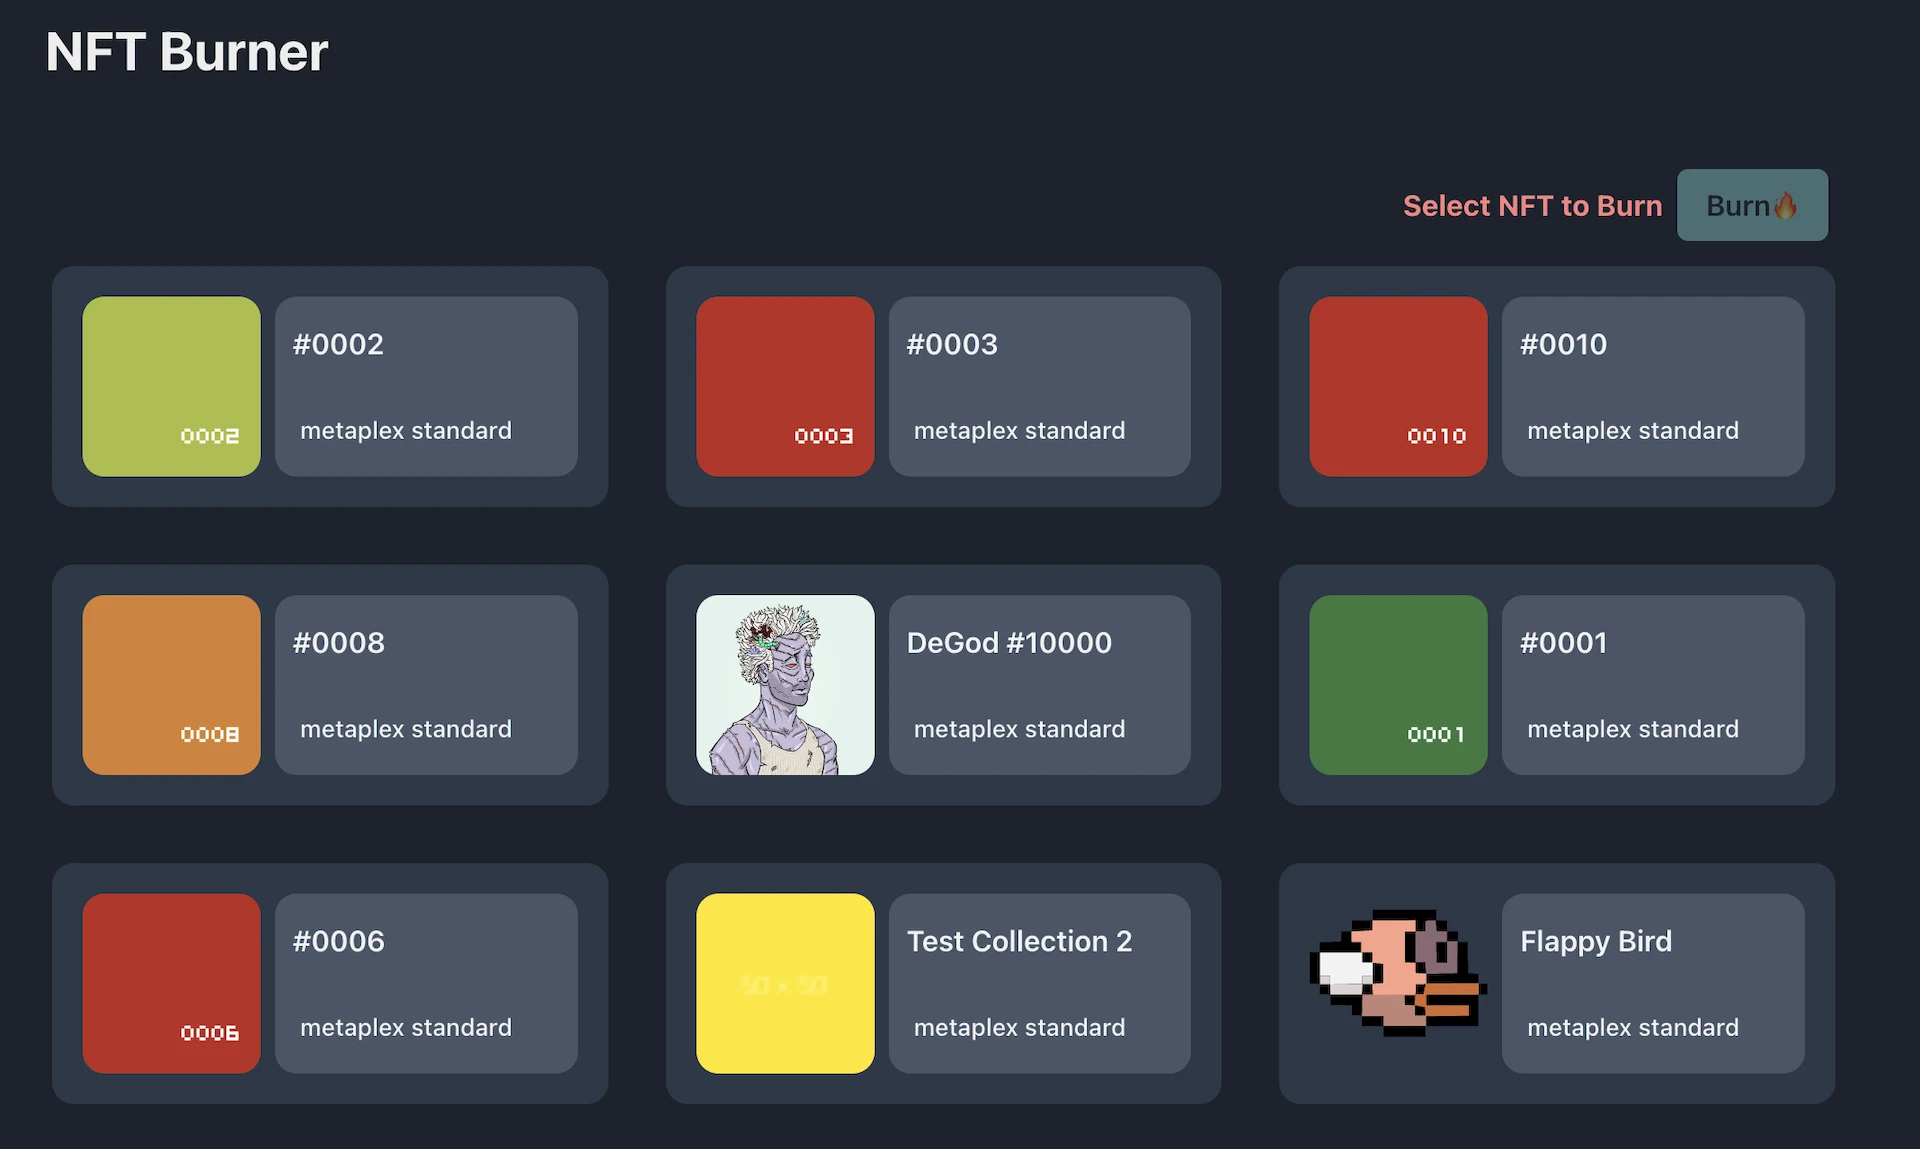
This is what the final application looks like. You can click on any NFTs in your wallet that you want to remove and click on the burn button to burn the NFT.

Instead of going through the entire code, we will focus on the important sections of code that power the application.
You can find the repository with the final code here: Solana-NFT-Burner.
Step1: Project Setup
Follow these steps to run the project in your local environment.
- Clone the project from GitHub using the
git clonecommand andcdinto the project
git clone https://github.com/JohnVersus/solana-nft-burner.git

cd solana-nft-burner
- Install the dependencies using the
yarnornpmpackage manager.
yarn install
- Rename
.env.local.examplefile to.env.localand add the required environment secrets.
# devent is used for chain Id as we will be testing the app on devnet chain
APP_CHAIN_ID=devnet
APP_DOMAIN=ethereum.boilerplate

# Get your KEY https://admin.moralis.com/web3apis
MORALIS_API_KEY= xxx

# Linux: `openssl rand -hex 32` or go to https://generate-secret.now.sh/64
NEXTAUTH_SECRET= xxx

# Replace for production
NEXTAUTH_URL=http://localhost:3000

# Wallet private only if you want to use the NFT Minter page.
PRIVATE_KEY = xxx
- Start the app in localhost port 3000.
yarn run dev
Once the command has been run successfully, you should be able to view the app in localhost port 3000, or click here to open the page directly.
Step2: Burning the NFT
In the app, you'll find multiple tabs, but for our code, we only need to access the/nftBurner page to burn the NFTs of the wallet. If you want to mint a new NFT for testing you can use the/nftMinterpage to mint NFTs.

To use the app, we must first connect to the Solana wallet. This can be done by clicking the "Select Wallet" button on the top right. You can then connect to the wallet of your choice.
The code related to authentication can be found in the src/components/modules/ConnectButton folder, although we won't be looking at the authentication code in this tutorial.
Once the wallet connection is successful, visit the/nftBurner page, and we can view the NFTs the wallet is holding.
The first step of the app is to connect the Metaplex SDK with the wallet and the devnet cluster.
Only partical code is shown here to keep it clean. Visit
src/components/templates/nftBurnerto view the entire code.
/*
 * We use the connected wallet and the cluster connection
 * with metaplex for creating and processing the transactions.
 */
const wallet = useWallet();
const connection = new Connection(clusterApiUrl("devnet"));
const metaplex = new Metaplex(connection);
metaplex.use(walletAdapterIdentity(wallet));
The next step is to handle the NFTs selected by the user in the UI and then burn the NFTs.
Here is the code responsible for selecting the NFTs in UI.
// Refer full code in `src/components/templates/nftBurner/NFTBurner.tsx`

//The NFTs selected in the UI are stored in state variable.
const [nftsToDelete, setNftsToDelete] = useState<Array<string>>([]);
const handleCheckbox = (e: ChangeEvent<HTMLInputElement>) => {
  const { value, checked } = e.target;
  if (!nftsToDelete?.includes(value) && checked) {
    setNftsToDelete((existing: Array<string>) => [...existing, value]);
  } else {
    const temp = nftsToDelete;
    if (temp.includes(value)) {
      temp.splice(temp.indexOf(value), 1);
      setNftsToDelete(() => [...temp]);
    }
  }
};

// Component responsible for selecting NFTs in the UI
<StyledCheckBox
  onChange={handleCheckbox}
  value={`${balance.mint}`}
  type={"checkbox"}
  checked={nftsToDelete.includes(`${balance.mint}`)}
/>;
Here is the code responsible for burning the selected NFTs.
// Refer full code can be found in `src/components/templates/nftBurner/NFTBurner.tsx`

// The data stored in nftsToDelete state variable is used to
// delete the selected NFTs

const burnNFT = async () => {
  // ...
  const totalTxs = await Promise.all(
    nftsToDelete.map(async (nft) => {
      const tx = await metaplex
        .nfts()
        .delete({
          mintAddress: new PublicKey(nft),
        })
        .run();
      return tx;
    })
  );
  setNftsToDelete(() => []);
  //...
};
And there we have it! That's all the code we need to burn and delete NFTs from your wallet.
Step3: Testing
The dapp can be tested by visiting the /NFTBurner page.
First, select the NFTs to delete in the UI.

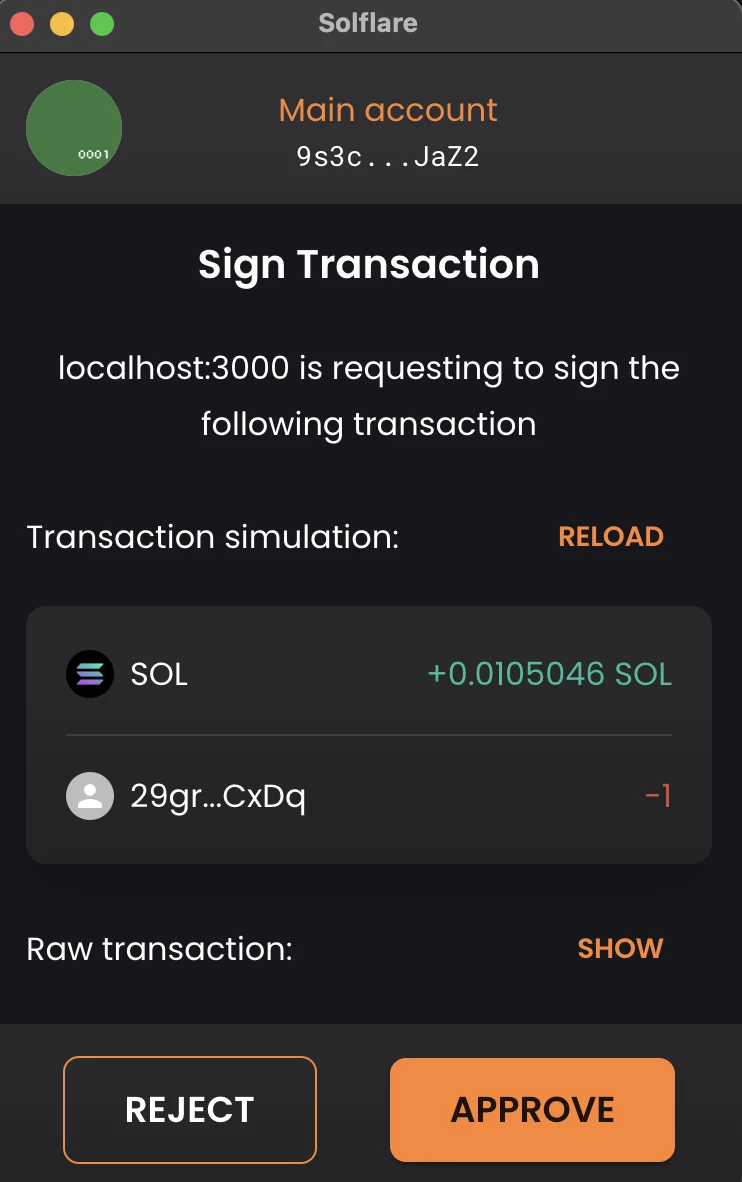
Then click on the "Burn" button to initiate the transaction and you will get a request from your wallet to sign the transaction. If you observe the gas fee in the transaction, you can see that it says +0.0105 SOL, which means that this transaction will return +0.0105 SOL back to your wallet.

Once the transaction is successful, your NFT will be successfully deleted from the Solana blockchain and you will find +0.0105 SOL added to your wallet.
Congratulations! 🥳
Now you know how to create your very own NFT burner dapp to delete spam or unwanted NFTs from the blockchain.
Support
If you have any trouble following the tutorial, feel free to reach out to our community engineers in our Discord or Forum to get 24/7 developer support.